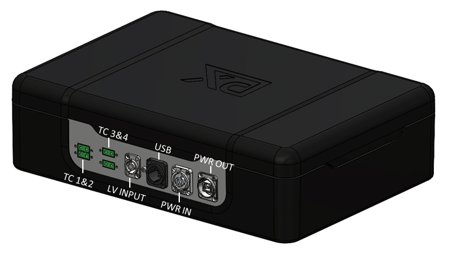
The following procedure should be followed to set up the HotStage and insert a sample for high temperature testing. It is also applicable to calibration samples.
- Ensure that the PLX-Benchtop is appropriately connected to a power supply and a computer via both USB and Ethernet.
- Ensure that the latest version of CORSICA is installed on the computer and that an active license file with HotStage capability enabled is present on the computer.
- Launch CORSICA – HotStage Testing. If the HotStage is not installed, follow the installation instructions:
- Ensure that the HotStage equipment is cool (i.e., not recently used) and unplugged from the HotStage electronics box. The crosshead will be raised to the upper limit switch.
- Remove the PLX-Benchtop indenter housing and LVDT assembly. Begin by undoing the LVDT connector. This is situated to the right of the machine under the crosshead. Rotate the connector and gently pull. With this done, detach the insert by taking out the three M3 bolts with a 2.5 mm Allen key. Take care to not damage the brass LVDT tip when removing the tip insert. Finally, remove the indenter housing by taking out the three M4 bolts with a 3 mm Allen key and the assembly should come out. To keep everything together, it is recommended that you return the insert to the indenter housing with the 3 bolts used to support the insert. Set this assembly aside in a safe space.
- Bolt the HotStage indenter holder to the Benchtop crosshead using the three M4 bolts supplied with the HotStage unit and highlighted in blue in the figure below.
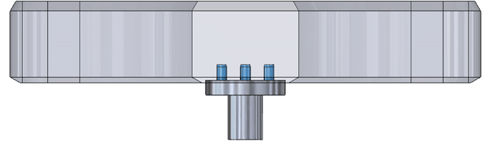
- Screw in the indenter tip holder (blue) and cover. First, attach the top enclosure and then screw in the indenter tip with your fingers. Use the 10 mm Hex wrench supplied with the HotStage unit to tighten the tip.
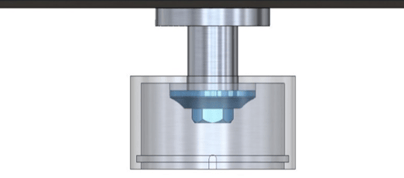
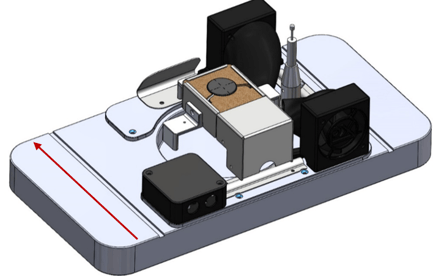
- Insert the HotStage base plate with fans and LVDT into the PLX-Benchtop workspace from the rear. Fix down the base plate with the three countersunk head M3 bolts provided with the HotStage (clearance holes highlighted in blue in). Place the heater assembly on the load cell using the legs highlighted in blue.
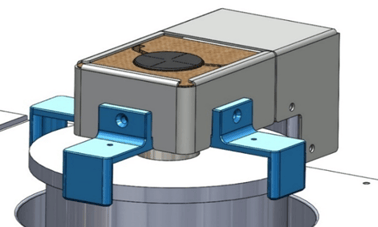
-
- Connect the electronics box ports to the PLX-Benchtop and computer. The HotStage has flying cables that attach/insert in the Power Out, Low Voltage Input and TC1&2 Ports. The Power In and the USB need separate cabling - supplied with the HotStage. The Thermocouples come with a male Duplex connector that can only be attached in a single orientation. TC ports 3 and 4 are for additional thermocouples that can be used at user's discretion. The LV Input has a locking mechanism that needs to be pulled to release the connector. The Power connectors need to be rotated to lock and release. The USB on the E-Box can be plugged into the side of the Benchtop Plastometer or the computer.